Understanding Install Auto Blogger Plugin On WordPress is essential. Installing an auto blogger plugin on WordPress is one of the most powerful decisions a content creator can make. During my eight years managing digital marketing for SaaS startups, I discovered that manual content creation was bleeding my teams dry. We were exhausted, overwhelmed, and falling behind on publishing schedules. Then I discovered auto blogging, and everything changed.
Now, as someone who went from publishing four articles monthly to over thirty automated posts, I understand the transformation this technology offers. How to Install auto blogger plugin on WordPress isn’t just technical knowledge—it’s your gateway to sustainable, scalable content production. Whether you’re building topical authority, managing multiple client sites, or creating a passive income stream, this guide will get you set up properly.
Install Auto Blogger Plugin On WordPress: What You’ll Need Before Installation
Before you begin learning how to install auto blogger plugin on WordPress, gather the essentials. You’ll need an active WordPress website hosted on a reliable server. Most modern hosting providers support auto blogging plugins without issues, though I recommend checking with your host about any plugin restrictions.
Your hosting plan should include adequate storage space and bandwidth for automated content. If you’re running a basic shared hosting plan at around £2–4 monthly, you might experience slowdowns with heavy automation. Consider upgrading to a better plan if you’re publishing twenty or more automated posts weekly.
Administrative access to your WordPress dashboard is essential. You’ll need to log in to the admin area and navigate plugin sections. If you’re managing a client site, ensure you have full plugin installation permissions. Additionally, have your RSS feed URLs or content sources ready if you’re pulling from specific publishers.
Install Auto Blogger Plugin On WordPress: Choosing the Right Auto Blogger Plugin
The plugin you select fundamentally shapes your automation success. How to install auto blogger plugin on WordPress begins with selecting software aligned with your goals. Popular options include WP RSS Aggregator, Feedzy RSS Feeds, and WPeMatico, each offering unique advantages.
Popular Auto Blogging Plugins Compared
WP RSS Aggregator excels at pulling content from multiple RSS sources and offers robust filtering options. It’s particularly useful if you’re aggregating content from industry publications. Feedzy RSS Feeds provides intuitive interfaces with strong SEO optimisation features built-in, making it ideal for bloggers prioritising search rankings.
WPeMatico stands out for advanced scheduling and automation rules, perfect if you need granular control over publishing times and post modifications. Eternal Auto Blogger represents the newest generation of automation technology, featuring persona-driven content systems and self-healing architecture that adjusts automatically when sources change.
Consider your budget too. Free plugins offer basic functionality, typically costing nothing upfront. Premium plugins range from £30–200 annually, depending on features and support levels. The investment often pays dividends through time saved and improved content consistency.
Install Auto Blogger Plugin On WordPress – Accessing Your WordPress Plugin Directory
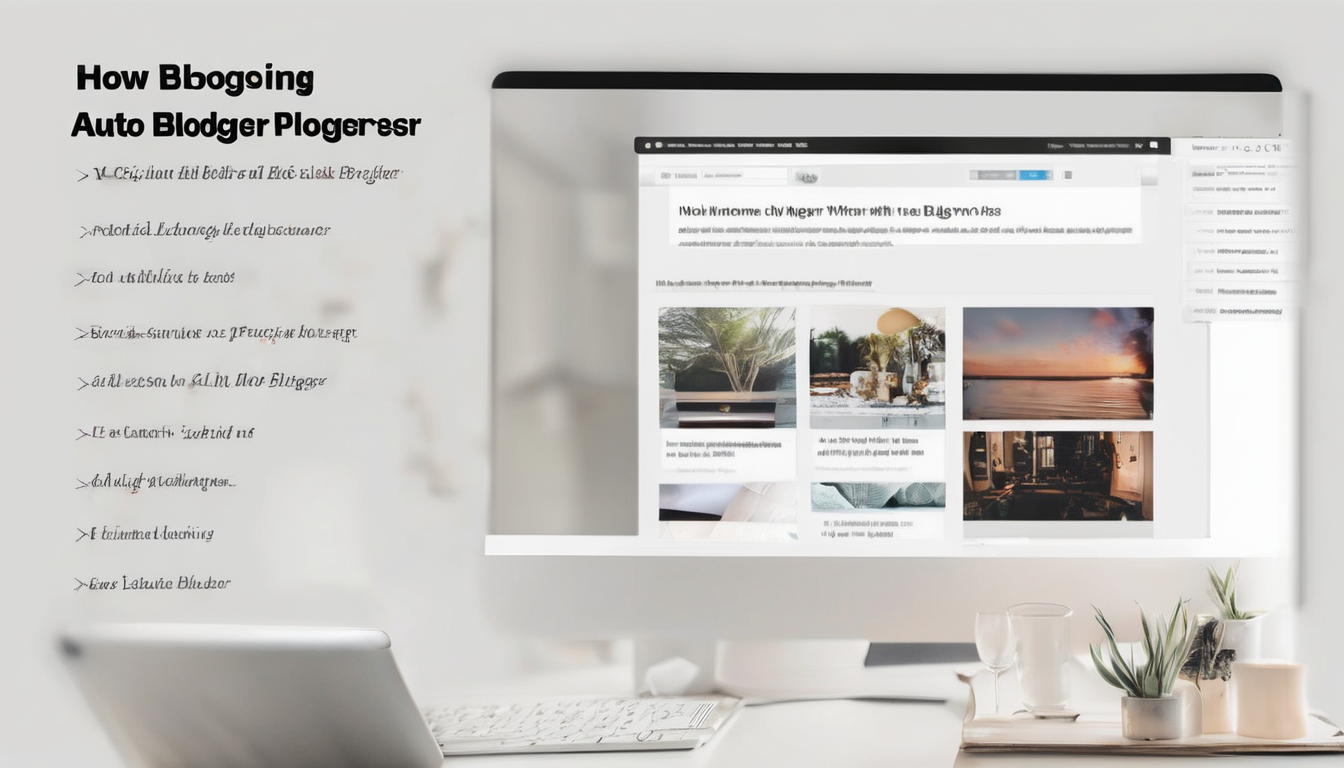
Understanding how to install auto blogger plugin on WordPress starts at your WordPress dashboard. Log in to your WordPress admin panel using your credentials. Once logged in, look at the left sidebar menu where you’ll find navigation options.
Click on the “Plugins” menu item in your WordPress sidebar. This expands to show additional options including “Installed Plugins” and “Add New.” For fresh installations, your plugin directory will appear relatively empty, showing only default WordPress plugins.
The “Add New” option is your gateway to discovering and installing auto blogging solutions. Clicking this button brings you to the WordPress plugin directory, where thousands of free plugins are available for immediate installation. You can search, filter, and preview plugins directly from this interface before deciding to install.
Step-by-Step Installation Process
The actual installation of how to install auto blogger plugin on WordPress follows a straightforward three-step process that takes less than five minutes for most users.
Step 1: Search for Your Chosen Plugin
In the plugin directory, use the search box to find your selected auto blogging plugin. Type the exact plugin name carefully, as similar-sounding plugins exist. For instance, searching “WP RSS Aggregator” specifically will show you the correct plugin, distinguishing it from other RSS-related tools.
Browse the search results carefully. Check the plugin description, read recent reviews, and verify the last update date. I always look for plugins updated within the last three months, indicating active maintenance and compatibility with current WordPress versions.
Step 2: Click Install Now
Once you’ve identified your plugin, click the “Install Now” button displayed prominently on the plugin card. WordPress automatically downloads the plugin files and installs them on your server. This process typically completes within 10–30 seconds, depending on your internet speed and server responsiveness.
During installation, you might see a loading indicator. Don’t navigate away or refresh the page until installation completes. WordPress will display a success message confirming that the plugin is ready for activation.
Step 3: Activate Your Plugin
After successful installation, a blue “Activate” button replaces the “Install Now” button. Click “Activate” to enable your auto blogger plugin. This is the critical step—without activation, your plugin won’t function at all, regardless of successful installation.
Upon activation, WordPress displays a confirmation message. You’ll notice a new menu item appears in your WordPress sidebar corresponding to your plugin. Congratulations—you’ve successfully completed the technical installation phase of how to install auto blogger plugin on WordPress.
Configuring Your Plugin Settings
Installation is just the beginning. Proper configuration determines whether your auto blogger plugin delivers quality content or generates mediocre results. Click on your plugin’s menu item in the sidebar to access its settings dashboard.
Setting Default Post Options
Most Auto Blogging Plugins require you to establish default post settings. These defaults apply to every article your plugin automatically publishes. Start by deciding your default post status: publish immediately or save as drafts for manual review.
Publishing immediately maximises content velocity and is ideal if you’ve thoroughly tested your automation rules. Saving as drafts provides quality control but requires manual review of each post. I typically recommend drafts initially whilst you’re learning how to install auto blogger plugin on WordPress properly and testing your system.
Next, assign a default author to imported content. This ensures consistent byline attribution across your site. You can select an existing WordPress user or create a generic “Auto Blogger” author account specifically for automated content. This approach maintains clear editorial distinction between human and automated posts.
Configuring Content Categories and Tags
Establish default categories for imported content. This helps organize your blog and supports topical authority building, which significantly improves SEO performance. If you’re creating content about sustainable business practices, auto-assigning articles to a “Sustainability” category ensures logical site structure.
Consider whether your plugin should automatically generate tags based on content keywords or apply predefined tags. Automatic tag generation saves time but sometimes produces irrelevant tags. Predefined tags offer more control but require more manual setup initially.
Setting Up Content Sources and Feeds
Now comes the creative part of how to install auto blogger plugin on WordPress—deciding what content your automation will pull. This step fundamentally shapes your blog’s voice, authority, and SEO performance.
Adding RSS Feed Sources
In your plugin settings, locate the section for adding feed sources. Click “Add New Feed Source” or similar button depending on your plugin. You’ll need the RSS feed URL from your chosen content sources.
Where do you find quality RSS feeds? Industry publications, competitor blogs, news sites, and expert resources in your niche typically offer RSS feeds. For technology blogs, consider TechCrunch, Wired, or specialized publications. For business content, try Industry Week or relevant trade publications. This relates directly to Install Auto Blogger Plugin On WordPress.
Paste the RSS feed URL into the designated field. Test the feed to ensure your plugin can access it properly. Most plugins include a “Test Feed” button that verifies connectivity before you add the source permanently.
Setting Update Frequency
Configure how often your plugin checks for new content. Daily checks balance freshness with server resources. If your sources publish multiple articles daily, consider checking every 12 hours. If they publish weekly, daily checks suffice.
This frequency setting directly impacts your content publishing velocity. If you’re pulling from three daily sources with 12-hour update checks, you could generate roughly 72 new posts monthly automatically. The mathematics of automation reveal why this technology scales content production so dramatically.
Automating Your Publishing Schedule
Most auto blogger plugin users don’t realise how powerful scheduling features are. Beyond simply auto-publishing, you can control when posts go live, which dramatically impacts traffic and audience engagement.
Establishing Publishing Times
Configure your plugin to publish posts at optimal times for your audience. If your audience is primarily UK-based professionals, publishing at 9:00 AM GMT captures them during their morning routine. If you serve international audiences, consider staggered publication times.
Some plugins allow you to randomise publication times within a specified window. This creates a natural publishing rhythm rather than clustering all posts at one moment. For example, publishing between 8:00–10:00 AM daily creates the appearance of consistent, natural blogging without the manual effort.
Managing Publication Frequency
Decide how many auto-generated posts should publish daily. Publishing too frequently risks overwhelming your audience and confusing search engines. Publishing too infrequently wastes your automation potential.
I typically recommend starting conservatively with one to three automated posts daily. Monitor your analytics for two weeks, then adjust based on audience engagement and traffic impact. Your ideal frequency depends on your niche, audience size, and existing content volume.
Remember that how to install auto blogger plugin on WordPress effectively includes setting sustainable publishing rhythms. Consistency matters more than volume in building topical authority and maintaining reader interest.
Optimisation Tips for Better Results
Simply installing and configuring your plugin isn’t enough. Successful automation requires optimisation to ensure quality, SEO performance, and audience value.
Implementing Content Filters
Use your plugin’s filtering capabilities to exclude irrelevant content. Most quality auto blogging plugins let you set keyword filters that block posts containing certain terms. If you notice your feeds occasionally include off-topic articles, create filters to exclude them automatically.
Positive filters are equally important. You can configure your plugin to prioritise content containing specific keywords or from particular sources. This ensures your automated content aligns perfectly with your topical authority strategy.
Enhancing SEO Performance
After learning how to install auto blogger plugin on WordPress, focus on SEO optimisation of your automated content. Configure your plugin to automatically add internal links to existing posts where relevant. This supports topical authority building and improves site-wide SEO performance.
Enable automatic metadata generation. Most plugins can create SEO-friendly meta descriptions and add structured data markup automatically. These features ensure Google understands your automated content properly, improving indexation and ranking potential.
Consider using RankMath or similar SEO plugins alongside your auto blogger plugin. These tools can automatically analyse your imported content and suggest optimisations before publishing, ensuring quality standards are maintained.
Setting Up Content Modifications
Many plugins allow you to modify imported content before publishing. You might add a disclaimer noting the content originated externally, include attribution links, or prepend an introduction contextualising the article within your blog’s broader narrative.
These modifications add value for your audience whilst maintaining ethical standards and legal compliance. Transparency about sourced content builds audience trust and protects your site legally.
Troubleshooting Common Installation Issues
Despite straightforward installation processes, sometimes issues arise when implementing how to install auto blogger plugin on WordPress. Understanding common problems helps you resolve them quickly.
Plugin Activation Failures
If your plugin doesn’t activate after installation, check your PHP version compatibility. Some plugins require PHP 7.2 or higher. Contact your hosting provider to verify your current PHP version and upgrade if necessary.
Memory limit errors occasionally occur if your server’s allocated memory is too low. Most modern hosting plans allocate 256MB or more, which is sufficient. If you see memory errors, contact your host about increasing your memory limit from their control panel.
Feed Connection Issues
If your plugin can’t connect to RSS feeds, verify the feed URLs are correct and still active. Some websites discontinue RSS feeds without notice. Test your URLs directly in a browser to confirm they’re accessible.
Occasionally, server firewalls block outbound connections to external feeds. Contact your hosting provider’s support team if your plugin consistently fails to fetch content despite correct URLs. They can whitelist necessary connections.
Duplicate Content Warnings
If Google Search Console reports duplicate content, ensure your plugin is properly handling content attribution and canonical tags. Most quality auto blogging plugins automatically add canonical tags pointing to original sources, preventing duplicate content penalties.
If duplicates persist, consider enabling your plugin’s unique content modes that rewrite or summarise imported articles rather than publishing them verbatim. This creates genuinely unique content whilst maintaining source attribution.
Next Steps After Installation
Completing how to install auto blogger plugin on WordPress is exciting, but your automation journey continues. After initial setup, focus on optimisation, monitoring, and strategic refinement.
Monitoring Performance Metrics
Track how your automated content performs compared to manual posts. Monitor metrics including bounce rate, average session duration, pages per session, and conversions. This data reveals whether your auto blogger plugin is delivering genuine value to your audience.
Use Google Analytics to segment automated versus manual content. Compare their performance honestly. If automated content underperforms, adjust your filtering rules, content sources, or modification settings accordingly. When considering Install Auto Blogger Plugin On WordPress, this becomes clear.
Scaling Your Automation
Once your initial setup stabilises, consider expanding. Add additional RSS sources, increase publishing frequency, or implement more advanced automation rules. Many successful content creators using auto blogging achieve 30–40 published posts monthly with minimal manual effort.
This scalability is precisely why auto blogger plugins transform content marketing. When how to install auto blogger plugin on WordPress becomes automatic (which it should be after this guide), you can focus on higher-value activities like audience engagement, strategic planning, and monetisation.
Continuous Optimisation
Auto blogging isn’t set-and-forget, despite what some marketers claim. Review your automation settings quarterly. Are your sources still relevant? Do your filters still serve their purpose? Technology and your business goals evolve, requiring periodic adjustments to maintain peak performance.
Consider joining communities of auto blogger users. Share experiences, learn from others’ strategies, and stay updated on plugin developments. The auto blogging landscape evolves constantly, and community insights help you maintain competitive advantage.
Remember that mastering how to install auto blogger plugin on WordPress is just the beginning. The real power emerges when you combine solid technical implementation with strategic content curation, audience understanding, and continuous optimisation. That’s when genuine, scalable content machines emerge.